Reflector Status: OPERATIONAL
updated: 04/26/2023
San Antonio has a dedicated XLX Reflector for hams to use. The reflector currently has multimode trans-coding enabled, meaning it can be accessed via D-Star, DMR, and System Fusion where all 3 modes can talk together. The idea of the reflector is to be a single place for all local repeaters and remote users to connect and stay in contact with friends and family no matter the digital mode. Visitors and residents alike are very welcome on the system. Here are the multiple ways to connect remotely:
- DMR: Brandmeister Talk Group 310217
- Fusion: YSF 64192 “XLX410”
- D-Star: XRF410A
- DMR: Pi-Star ‘DMR Gateway’ XLX410 A
There is no need to register your callsign on D-Star to use this reflector like you would to access REF reflectors. XLX reflectors work without checking a trust server. So do not worry if you are a D-Star user and have never gone through a callsign registration process. You can still use this reflector.
Modules:
All XLX reflectors offer up to 26 modules, A – Z. Modules stem from D-Star reflectors, but can be thought of as 26 available rooms to a hotel with the XLX reflector being the hotel. Its up to the owner/operator of the reflector to enable and disable modules. There is currently no standard for how XLX modules work, so each reflector will use modules differently. Its a good idea to check a XLX reflectors web dashboard to see if any modules are labeled. The current modules enabled on this reflector are:
| Module | Name | Digital Mode | Purpose |
|---|---|---|---|
| 410 A | Transcoding | Any | The "Main" Channel of the reflector that offers Transcoding between digital modes |
| 410 B | Plan B | DMR | Used as a backup for direct connection to the reflector, DMR Clustering and bypassing Brandmeister. |
| 410 C | D-Star Alt. | D-Star | Used for D-RATS Data Communication and Voice. |
| 410 D | Default | DMR | General purpose, nothing formal yet. |
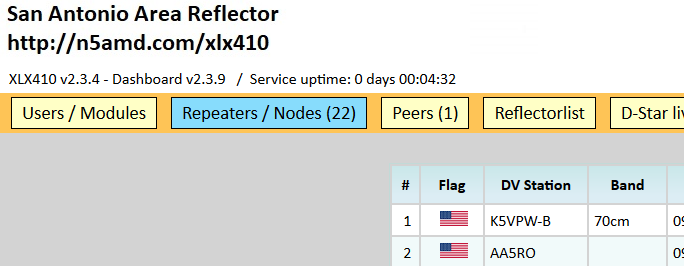
Web Dashboard
The reflector has a realtime web dashboard to see other nodes and users connected and to what module they are connected to.
Best Practices:
- Announce what mode you are coming in on.
- For example: “This is N5AMD on DMR, monitoring”
- OR “AE5JO this is N5AMD on Fusion”
- Dont be afraid to say hello to unfamiliar voices/callsigns.
How to connect to the reflector on your D-Star Radio:
Because XLX is not available in DR mode radios, like REF, you will have to use the “UR” field to link manually. Trans-coding occurs on the A module of the reflector and will need to be connected through a hotspot or pi-star enabled repeater. Icom based gateways do not support connecting to XLX reflectors. For example: G1, G2, G3
- Kerchunk XRF410AL in the UR field while connected to a hotspot or repeater.
- Switch to “Use Reflector” in DR mode radio and start talking.
How to connect to the reflector on your Yaesu Fusion Radio:
This reflector is using XLX, which means any hotspot or pi-star enabled device can connect to it. All you need to do is simply choose the following YSF Room: 64192 “XLX410”.
How to connect to the reflector on your DMR Radio using Brandmeister:
Brandmeister was kind enough to help tie their network in allowing for easy access from DMR. On any Brandmeister connected node/repeater simply use Talk Group: 310217
!! There are occasions when Brandmeister is doing maintenance or work on their end, which will drop the peer. Talkgroup 310217 will remain active, but it wont be tied to XLX410 at all. In which case, use DMR Gateway below. !!
How to connect to the reflector on your DMR Radio using “DMR Gateway” in Pi-star:
DMR Gateway offers the ability to connect to this reflector directly from your repeater or hotspot as oppose to using Brandmeister. Your connection will be direct to the reflector, bypassing Brandmeister or any other third party all together. If Brandmeister ever has problems, you can still connect via DMR. The dis-advantage is, as you will see, its a little more tricky to connect. You can leave this connection active along side your Brandmeister connection thanks to the MMDVMs ability to connect multiple DMR networks simultaneously.
In Pi-Star:
- Make sure the DMR mode is enabled
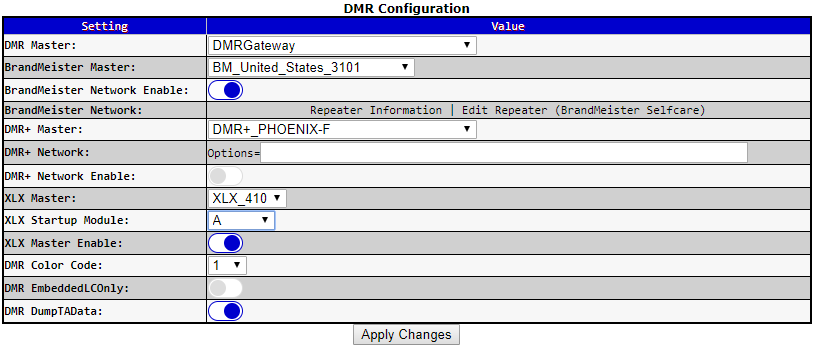
- On the configuration page, under “DMR Configuration” change the “DMR Master” to “DMRGateway” and APPLY.
- Back under “DMR Configuration” change “XLX Master” to “XLX_410” #you can opt to disable DMR+ Network to disable the additional voice traffic.
- Choose “A” for the module
- Enable “XLX Master Enable“
- Apply Changes
In your DMR codeplug:
- Create 2 new contacts
- Name: “Link to XLX410 A” TG: 64001 (priv call)
- TG: 64002 = XLX410 B,
- TG: 64003 = XLX410 C, etc….
- Name: “Talk on XLX410 A” TG: 6 (group call)
- Name: “Link to XLX410 A” TG: 64001 (priv call)
- Program these into channels for your pi-star device and then the zone of your choice
On your DMR radio:
- Go to the zone/channel where added the 2 new contacts.
- Pi-Star should connect to the “A” module of XLX410 automatically with your pi-star configuration setting. If not, we need to be on the “A” module by Kerchunk your channel “Link to XLX410 A”, then immediately switch to your channel “Talk on XLX410 A”.
- Link announcements and QSOs on the reflector will be done via “Talk on XLX410 A” (TG 6)
- Brandmeister is still connected to your pi-star, so you can still use your radio like normal, but be connected to 2 different DMR networks at the same time. If you did not disable the DMR+ network, you will be connected to 3 different networks at the same time. Neat huh?!
How to connect via DMR or Fusion directly using the OpenSpot:
You can connect to this reflector directly from the SharkRF OpenSpot as oppose to using Brandmeister. Your connection will be direct to the reflector, bypassing Brandmeister all together. If Brandmeister ever has problems, you can still connect via DMR or Fusion. The dis-advantage is, as you will see, its a little more tricky to connect.
In the OpenSpot

- Set the Modem to DMR or Fusion(for crossmode)
- Go to the “Connectors” Tab:
- Edit Connector: “HomeBrew/MMDVM“
- Then under “DMR/HOMEBREW/MMDVM“
- Choose “Protocol“: MMDVM
- Choose “Server“: XLX410
- SAVE
In your DMR Codeplug
You will create at least 3 new contacts and a few channels
- Create the following contacts:
- Name: “TG 9” TG: 9 (Group Call)
- Name: “OSP XLX Disconnect” TG: 4000 (Group Call)
- Name: “OSP XLX A” TG: 4001 (Private call)
- Name: “OSP XLX B” TG: 4002 (Private call)
- Program these contacts into channels for the OpenSpot. TG 9 is where link announcements are made along with how you TX/RX on the reflector. Create a channel for TG 9, a channel for XLX A, a channel for XLX B, a channel for XLX Disconnect, etc… then add them into a zone.
On Your DMR Radio
- Go to the zone where you programmed the channels for your OpenSpot.
- The A Module is where transcoding occurs. Kerchunk your channel “OSP XLX A” and immediately switch to “TG 9”. You can create a RX Group for the “OSP XLX A” channel if you want to avoid switching channels rapidly to hear the announcements.
- In order to talk on and listen to the reflector make sure to select your channel “TG 9”.
- To switch modules, you must disconnect first, then link to the module of your choice. Simply switch to “OSP XLX Disconnect” and kerchunk to send a disconnect.