updated: 01/21/2021
After you get your MMDVM repeater put together, the last important step is to tune the audio levels. Digital voice can be very picky when it comes to audio levels from a repeater standpoint. If the raw audio is either too quiet or too loud, subscriber radios will not decode the digital signal properly. A common symptom of an improperly tuned repeater is, the user will see a signal, and on analog hear the digital noise, but the digital radio wont decode the audio. It often leaves new MMDVM builders banging their head trying to figure out why their node isn’t working after all their hard work. Special thanks to www.f5uii.net. This post and my learning came from his page.
MMDVM-Cal is a program that comes built into Pi-Star and is accessed through the command line in Linux. It is a multi purpose tool to help calibrate a few different things on your MMDVM. The tool we are going to focus on is the “Deviation” or audio level adjustment. Its an easy to use app, even if you are not comfortable with the command line. This calibration process is intended for MMDVM repeaters, not hotspots, however, this process can be followed just the same if you needed to adjust your hotspots audio levels for whatever reason.
What’s involved:
- Using a dummyload instead of an antenna for testing. *IMPORTANT TO NOT POLLUTE THE AIRWAVES
- Using an SDR to see wave peaks sent from MMDVM-Cal.
- Using the command line in pi-star.
What you will need
- A dummy load
- An MMDVM-radio style board
- Pi-star
- Any SDR with the app of your choice (screen shots below are from CubicSDR)
tldr:
- Plug the dummy load into your radio.
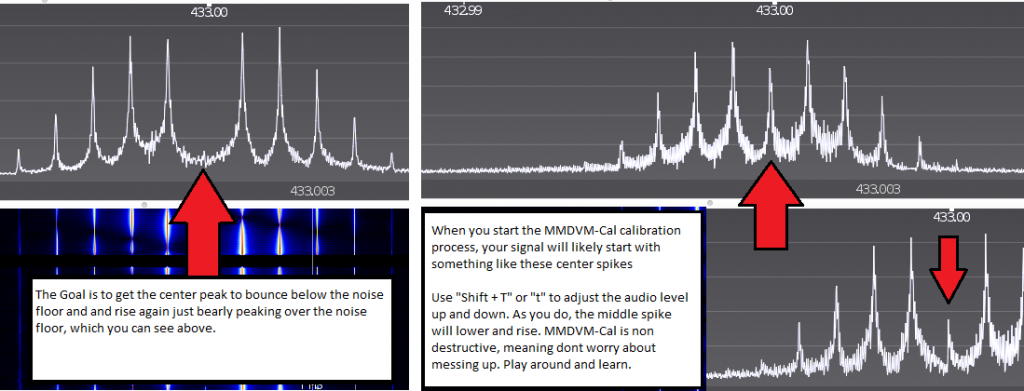
- Have the SDR tuned to your MMDVM Repeaters frequency and zoomed way into the signal. (See picture below)
- SSH into pi-star and run the command: “sudo pistar-mmdvmcal“
- “SHIFT+D”, to enter “DMR Deviation mode”.
- Press SPACEBAR to start transmitting.
- Use “T/t” to increase/decrease the level
- Adjust the center spike down below noise floor
- Keep lowering till the spike rises again slightly above noise floor, just the tip.
- Hit SPACEBAR to stop transmitting *ALSO IMPORTANT
- Note the % value from the command line on mmdvmcal. Multiply by 95%.
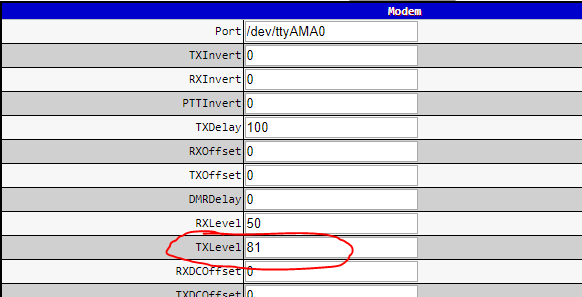
- Example 85*0.95 = 81 <—your new TX level setting for the Expert page in pi-star.
The How-to
- Plug a dummy load into your repeater/node. A solid tone will be generated and others dont need to hear it.
- Tune your SDR to the frequency of your MMDVM.
- SSH into your pi-star to get the command line, then run the following:
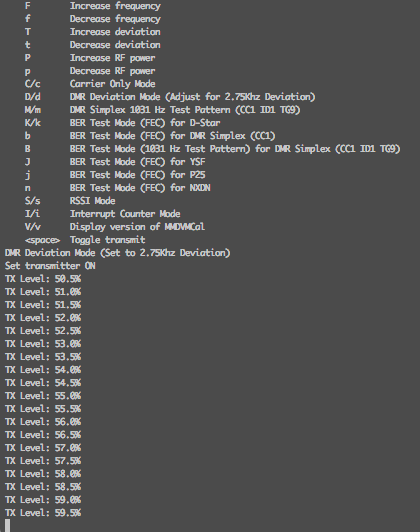
- In the Command list you will see:
- “D/d DMR Deviation Mode (Adjust for 2.75Khz Deviation)”
- Press SHIFT+D to put mmdvm-cal into DMR Deviation mode.
- Double make sure the dummy load is plugged in, then press SPACEBAR to begin transmitting the tone.
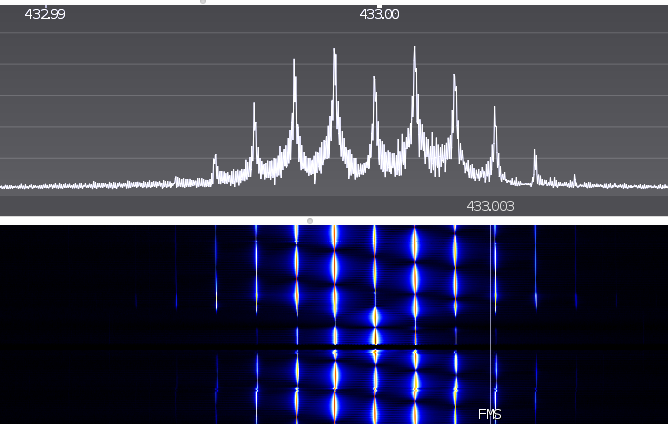
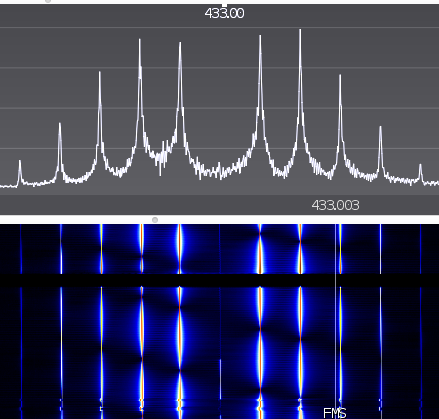
- Now looking at your SDR, do you notice the spikes? If not try zooming in. Notice the frequency spacing is small in the pic below…
- Press T/t (Uppercase/Lowercase “T”) to adjust the audio levels up and down. You will see the middle spike begin to move up and down with the levels.
- The objective is to get the center spike DOWN below the noise level then have it slightly raise again above the noise floor.
- Once you have the middle spike set, note the audio level percentage. This does not set the level for you.
- Take the % result and multiply it by 95%.
- Example: 85*0.95 = 81 <—your new TX level setting.
- Plug this new setting into the MMDVMHOST expert page under “Modem”
Simply exit out of MMDVM-Cal with “q” for quit, and try your Digital mode again. Even if you do not plan on using DMR this process is still applicable. DMR is really picky when it comes to audio levels. If you have adjusted for DMR, any other digital mode you use will work from this tuning.
